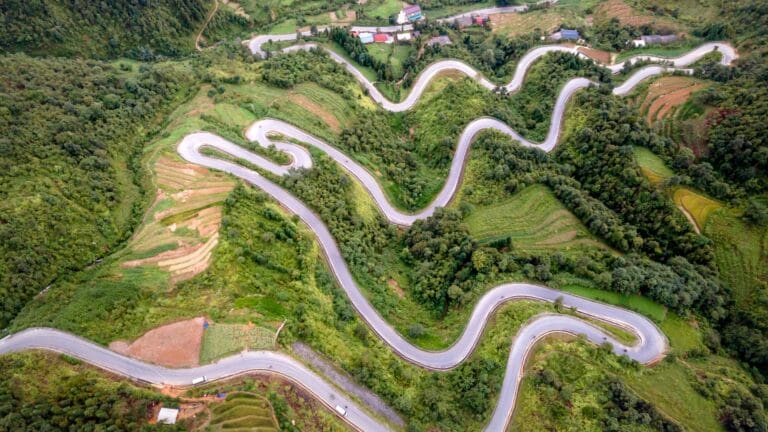
I trekked the Manaslu Circuit in November 2025, and I chose it because it’s one of the best “big” Himalayan treks if you want something that still feels remote and raw, without being a full expedition. It’s not the easiest trek in Nepal, but it’s very doable if you plan properly, respect altitude, and don’t underestimate the long days.
This post is a practical guide (route, distances, time, costs) combined with first-hand experience (what it actually feels like day to day).
I also wrote a separate post about everything you should know about altitude sickness before going on a trek like the Manaslu Circuit, so make sure to read it as well.
In This Article
Quick Facts at a Glance
- Total distance: 177 km/ 110 miles (My trip: 158 km measured with Garmin watch)
- Duration: 13 to 14 days, including drive from and to Kathmandu (12 days for me)
- Highest point: Larkya La Pass ~5,106 m/ 16,752 ft
- Difficulty (physical + altitude): Moderate
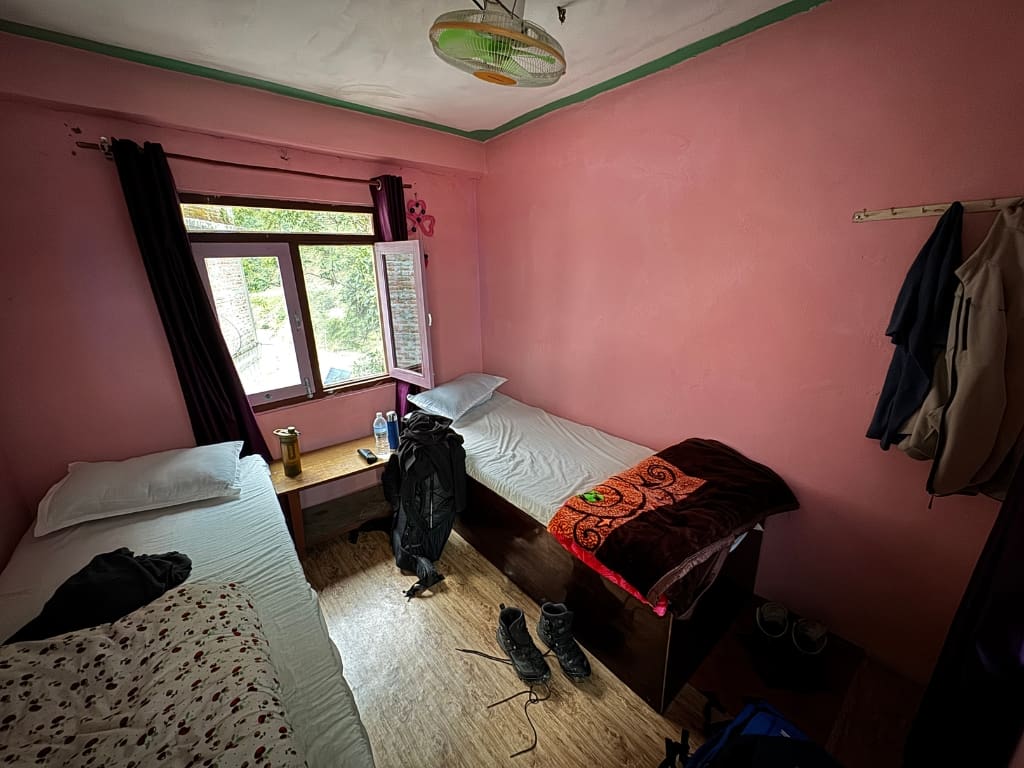
- Accommodation: Basic teahouses
- Permit requirements: Special permits and guide are required
Why Manaslu?
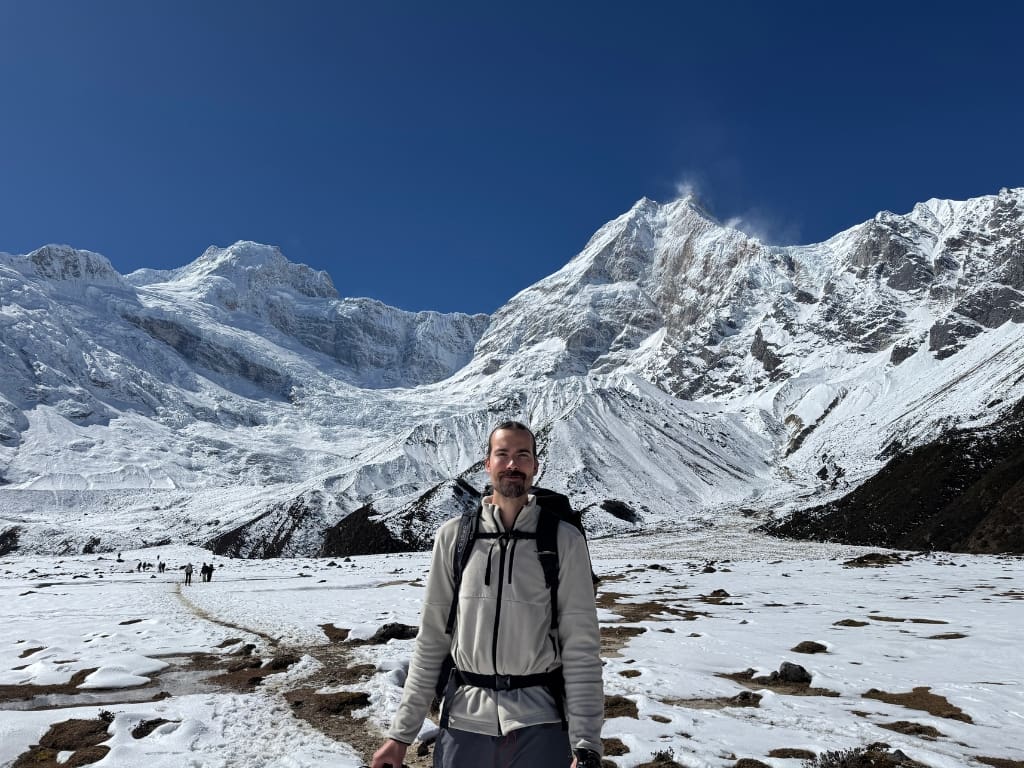
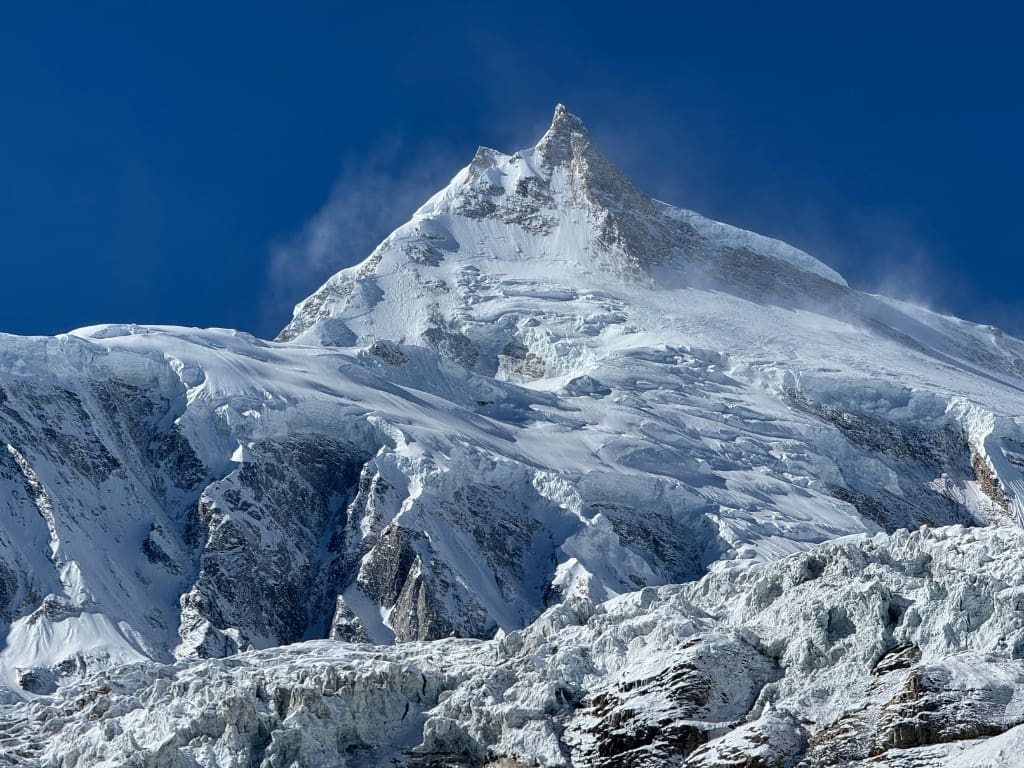
Manaslu is a loop-style trek that circles Mt. Manaslu (8,163 m). The eighth-highest mountain in the world is the highlight of the many views along the trek, always appearing from a different angle.
The trek is less commercial than Everest/Annapurna, villages feel more traditional, and there are fewer “tourist comforts” once you get deeper into the valley.
Manaslu is for you if:
- You want fewer crowds and a more “expedition-lite” vibe
- You’re okay with simpler teahouses and colder nights
- You can handle several 7–8-hour walking days
- You’re willing to hire a guide (it’s required)
Manaslu is not for you if:
- You want full comfort, lots of cafés, and a hot shower every day
- You want to trek solo independently (not allowed in the restricted area)
When to Go: Best Months & Conditions
Similar to other Himalayan treks, the best time to go is spring (March to May) and autumn (September to November). The weather is moderate and stable, and should be mostly dry, but the mountains are unpredictable.
Spring is warmer, and you can see lots of blooming vegetation in the lower altitudes.
Autumn, on the other hand, offers very dry conditions, crisp views of beautiful snow-capped mountains, but also colder nights.
Our guide told us he prefers spring, because of the flowers, and the fact that every day it gets warmer and warmer.
I was trekking in November and loved the views of the snow-covered mountains. When I saw a video from the trek in spring, I was thinking our views were much better. However, from day 4 onward, it would get very cold after sunset, and the room temperature was just a few degrees warmer than outside.
A few days before the start of our trek, a huge snowstorm hit the region, which was unusual for the end of October. It resulted in several casualties on the Larkya Pass, which was then closed for a few days, and the melting snow was causing landslides along the route.
Although we were lucky, our weather was perfect, and the Nepalese were able to fix the road in time, you have to keep in mind that the conditions in the mountain environment are unpredictable.
Physical Preparation: What You Actually Need
I think any active person with average fitness can make the trek. The question is, how much will you enjoy it? Some cardio and leg exercises for a few weeks before the trek will get you in shape and give you confidence.
The first three days are long and have a higher elevation gain. There is still flexibility, and even with a slow tempo, you will manage to do it before sunset. As you get higher, you need to respect the high altitude, so the elevation gains and distances are not that great. The Larkya Pass day is challenging physically and mentally, but if you just find your tempo and keep pushing, you can do it.
I carried my own backpack, which was somewhere between 12 and 15 kg. It was too heavy, basically because I’ve had no experience, but I’ll shortly explain how not to overpack. The weight adds a lot on difficulty, so if you’re not sure about your physique, or just want to enjoy the trek being lightweight, hire a porter.
Gear That Matters (and What Doesn’t)
Here’s what was actually important for late autumn:
- Warm layering system: base layer + fleece + puffy + shell
- A good thermal base layer is a must; it’s more of an isolation, so you won’t get too warm or too cold.
- Choose lightweight fleece
- A down jacket is essential for keeping you warm, especially after the trek when you stop moving.
Invest in a good quality, real-feather jacket with at least 700 cuin fill power. - If you plan to buy a jacket in Kathmandu, I have to warn you. After visiting at least a dozen shops, all the jackets are fake, synthetic, less warm, heavier, and less packable than the real stuff. You don’t need fancy brand logos; a duck or goose down jacket from Decathlon will do the same job.
- Your outer layer will depend on how warm the puff is and what time of the year you trek. Choose a windproof shell jacket. For autumn treks, when rain is rare, it doesn’t have to be waterproof, and you can buy a lightweight raincoat just in case. Otherwise, make sure it is light and doesn’t take up much space.
As for the other clothes, I’ll say just one word: Merino. I’ve had merino wool underwear, shirts, and socks, and they’re just what you need. Take as few pieces as possible to keep lightweight. You can wash them, and the sun will be strong enough to dry them even in higher altitudes.
- Sleeping bag: teahouses get cold; don’t rely on blankets alone
- Again, the sleeping bag should be down-filled, rated for at least – 10 °C. The agency helped me rent a high-quality North Face sleeping bag in Kathmandu, which kept me warm the whole trek. Just be careful not to get scammed if you rent the bag yourself. I recommend getting a sleeping bag liner for extra comfort and hygiene, as you can expect many people used the rented sleeping bag.
- Good boots (broken in) + blister plan
- Good isolation and waterproofing are necessary if hiking in late autumn, because of the snow. I recommend ankle-high boots, as the risk of stepping off the edge of a stone increases with tiredness, and you can easily sprain your ankle.
- Trekking poles: huge for the descent after the pass
- I just loved my hiking poles. They helped me shift some body weight to my upper body while going uphill and also keep my balance while going down.
- Water purification: tablets/filter – buying bottled water adds up and creates waste
- Choose your way of purifying tap water. There’s a tap in every village, so it’s easy to refill as you go.
- I’ve used Grayl Geopress, and it was awesome because I could add electrolytes to the water bottle without damaging the filter. On the other hand, it is quite large and heavy.
- A Katadyn filter may be a good alternative. Either way, make sure the filter doesn’t freeze, as mine did, because it might not function properly after that.
- Headlamp: essential for night bathroom breaks and Larkya Pass ascent.
- Sunscreen, lip balm, and sunglasses to protect yourself from the sun.
Guides, Permits & Logistics
Manaslu is a restricted region. Based on my experience, there are real checkpoints along the way and officers really process the permits, so it’s necessary to follow the rules.
- You generally need a registered trekking agency to process permits
- You need a licensed guide
- The restricted-area permit is typically issued for groups of at least two trekkers
If you travel in pairs or with a small group, I suggest you find a local agency with strong online reviews. You’ll pay for permits, transport, a guide, and optionally for a porter. After that, you will pay only for accommodation and what you eat at the teahouses. I think the whole package offers are overpriced.
On this trek, there aren’t better or worse rooms, cheaper or more expensive food, etc., so the only thing that can make a difference is an experienced and friendly guide. You can save money by just paying for everything separately.

Permits you’ll usually need
- Manaslu Restricted Area Permit (MRAP) – price depends on the season and the number of days in the restricted area.
- Peak season (Sep–Nov) USD 100 for the first 7 days + USD 15/day after.
- December to August: 75 USD for 7 days and 10 USD/day after
- Manaslu Conservation Area Permit (MCAP) 3000 NPR ~USD 21
- Annapurna Conservation Area Permit (ACAP) 3000 NPR ~USD 21 (because you exit toward the Annapurna region)
- Chum Nubri Rural Municipality Entrance Fee 1000 NPR ~USD 7
- You don’t need a printed photo for permits anymore, just a passport-style photo, which you’ll send to the agency.
Cost Breakdown: What to Expect
- Guide cost: 25 USD per group/day (including days of transport from and to Kathmandu)
- Porter cost: 22 USD per day (maximum 20-25 kg of baggage)
- Permits: 150 – 180 USD per person (depends on the length of the trek)
- Accommodation & food (breakfast, lunch, and dinner) per day: ~22 USD in the lower altitudes (first half), ~34 USD in the higher altitudes (second half)
- Transport:
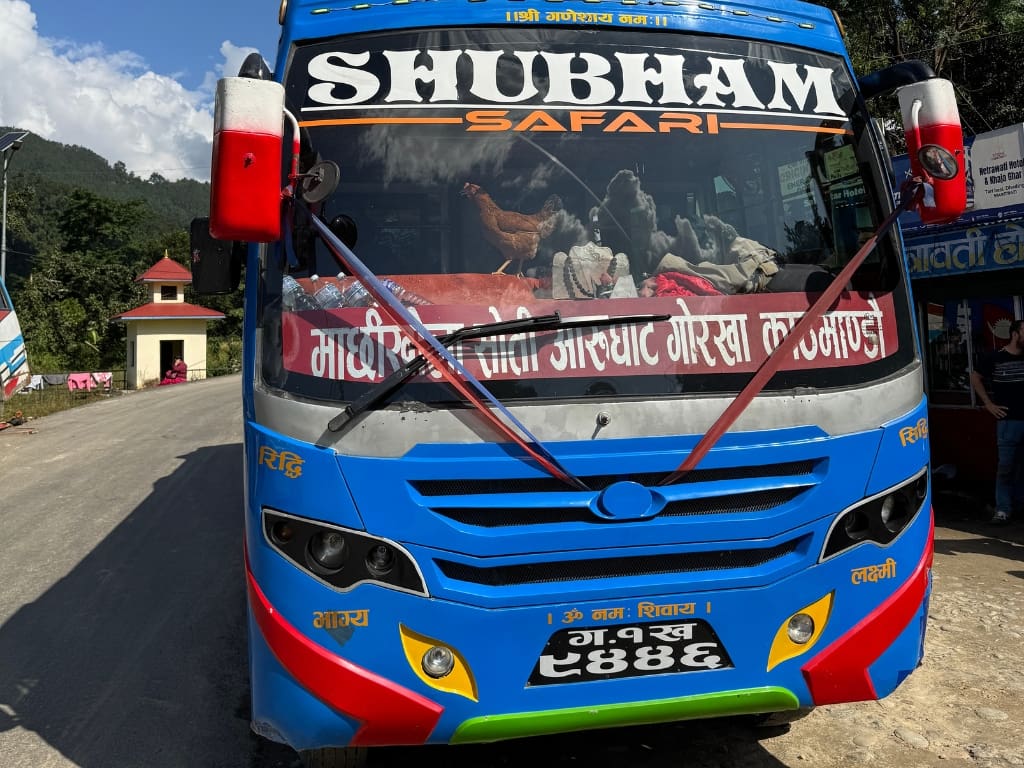
- Bus round-trip 4200 NPR ~29 USD
- Private jeep from Kathmandu ~200 USD per vehicle, and ~300 USD back to Kathmandu
- Gear rental:
- 10 USD per trip for a down jacket, hiking poles, and a sleeping bag,
- 1,4 USD per day for a sleeping bag alone
- Hotel with breakfast in Kathmandu: ~23 USD per person/night
- Wifi and hot showers are charged extra.
- Total per person for all the expenses on the trek, and 1 day in Kathmandu before and after the trek:
- 815 USD on budget,
- 960 USD with porter
- 1,180 USD using jeep rides (there are 6-7 seats, so it is expensive if travelling in a pair, remember to count a guide and porter)
Our agency gave us a quote for 950 USD per person (including meals, transport, 3 nights in Kathmandu, a guide, and permits).
We ended up paying for everything separately, and although we shortened our trip from 13 to 12 days, we didn’t ask for money back from the guide. We spent 3 nights in Kathmandu, didn’t hire a porter, went by bus, and on the way back, there was a jeep with no customers, so we paid ~100 USD for the ride.
My total was ~1300 USD, including all meals, drinks, tips, a massage, and an airport taxi. Basically, everything I spent, excluding souvenirs and flight tickets (715 USD from Europe with Air Arabia).
Health & High Altitude
Altitude can affect anyone. The trek is designed to safely acclimatize to high altitude conditions, so you don’t have to worry about that. Definitely do at least one acclimatization hike in days 5 to 8; it helps a lot.
You can read about the preparation, prevention, symptoms, and treatment of the most common health issues at high altitude in a separate article.
Make sure to pack pain relievers, electrolytes, Magnesium, throat pastilles, good blister care, and bandage or tape.
Day-by-Day Route Overview — Manaslu Circuit Trek
Day 1: Machhakhola → Jagat
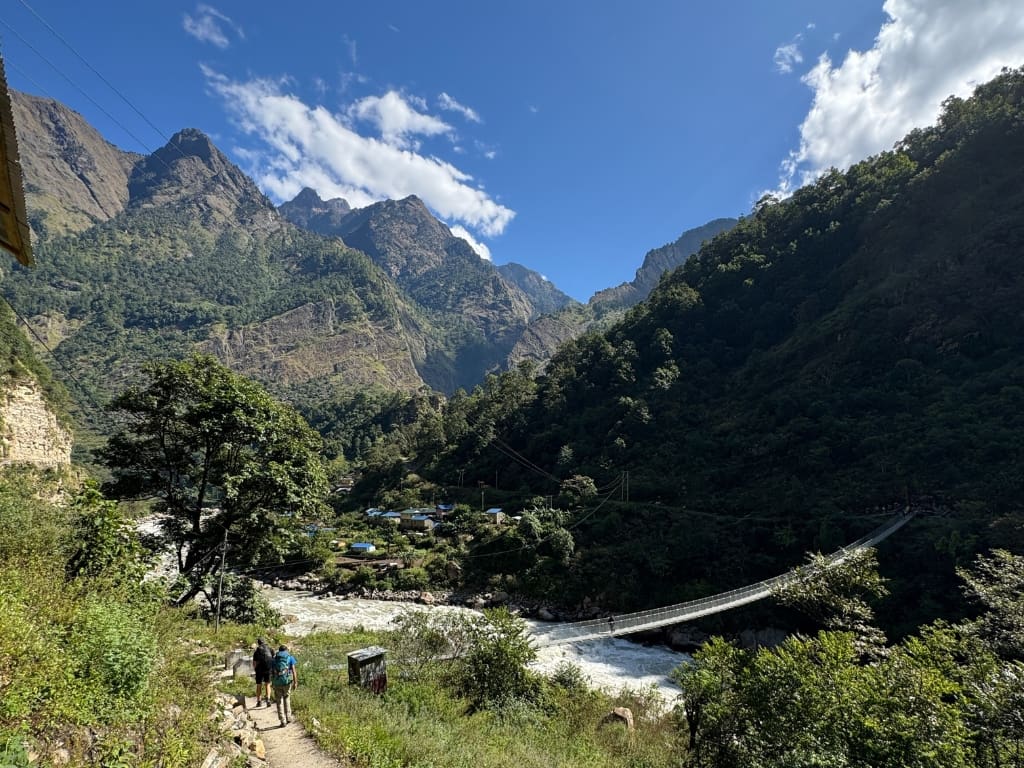
- Distance: 17.4 km
- Time: ~7 h 15 min
- Elevation: ↑ ~1,280 m / ↓ ~800 m
- Sleeping altitude: 1,320 m
- Notes: Long, hot opening day. Narrow trails, suspension bridges, waterfalls, and river sections. Sets the tone physically.
Day 2: Jagat → Deng
- Distance: 18.5 km
- Time: ~8 h 15 min
- Elevation: ↑ ~1,400 m / ↓ ~850 m
- Sleeping altitude: 1,860 m
- Notes: Similar to day one. Lots of greenery, beautiful views, and a first real sense of remoteness.
Day 3: Deng → Namrung
- Distance: 16.7 km
- Time: ~7 h 30 min
- Elevation: ↑ ~1,380 m / ↓ ~640 m
- Sleeping altitude: 2,590 m
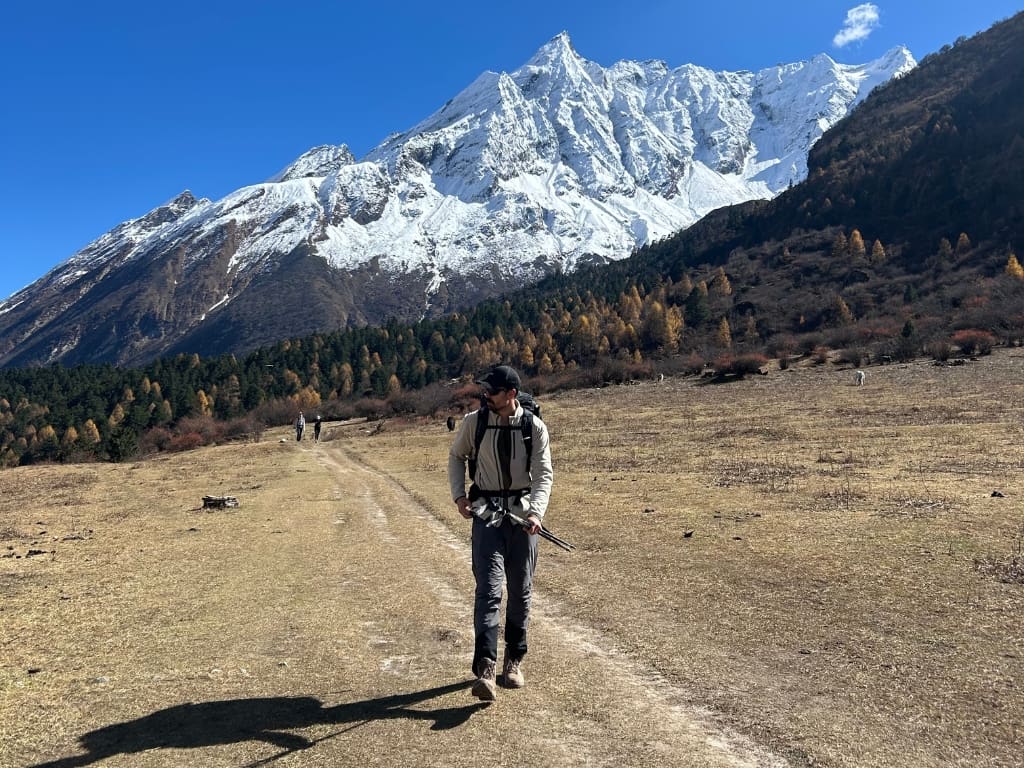
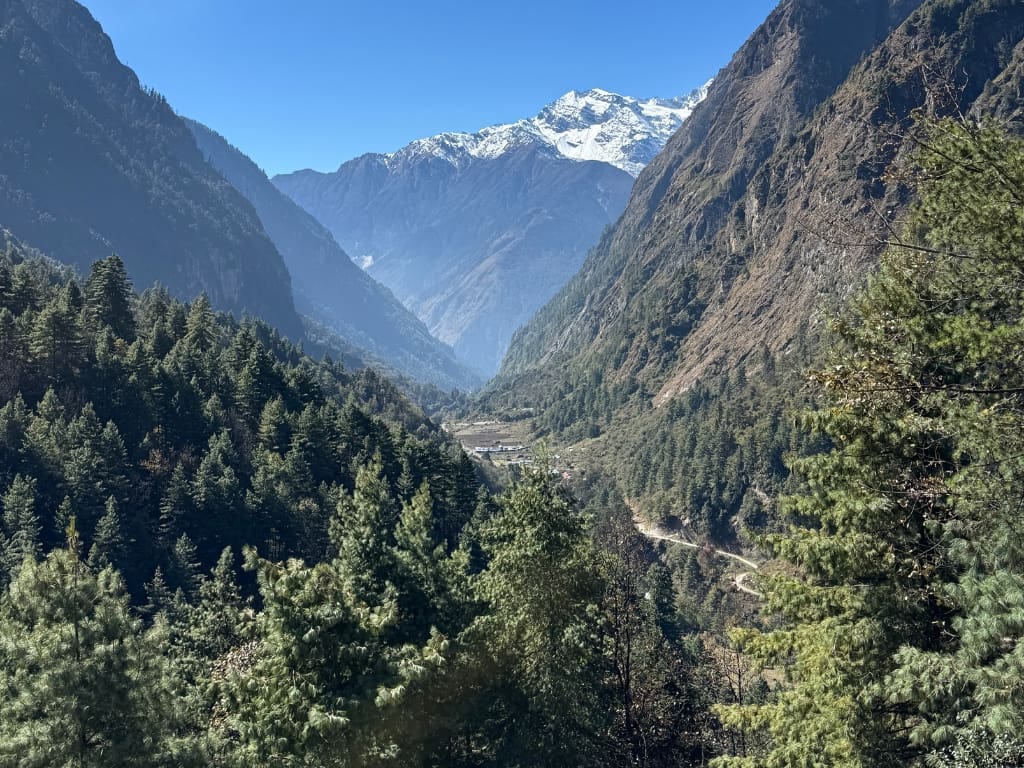
- Notes: One of the tougher continuous climbs. The landscape begins to change noticeably with the first views of snow-capped mountains.
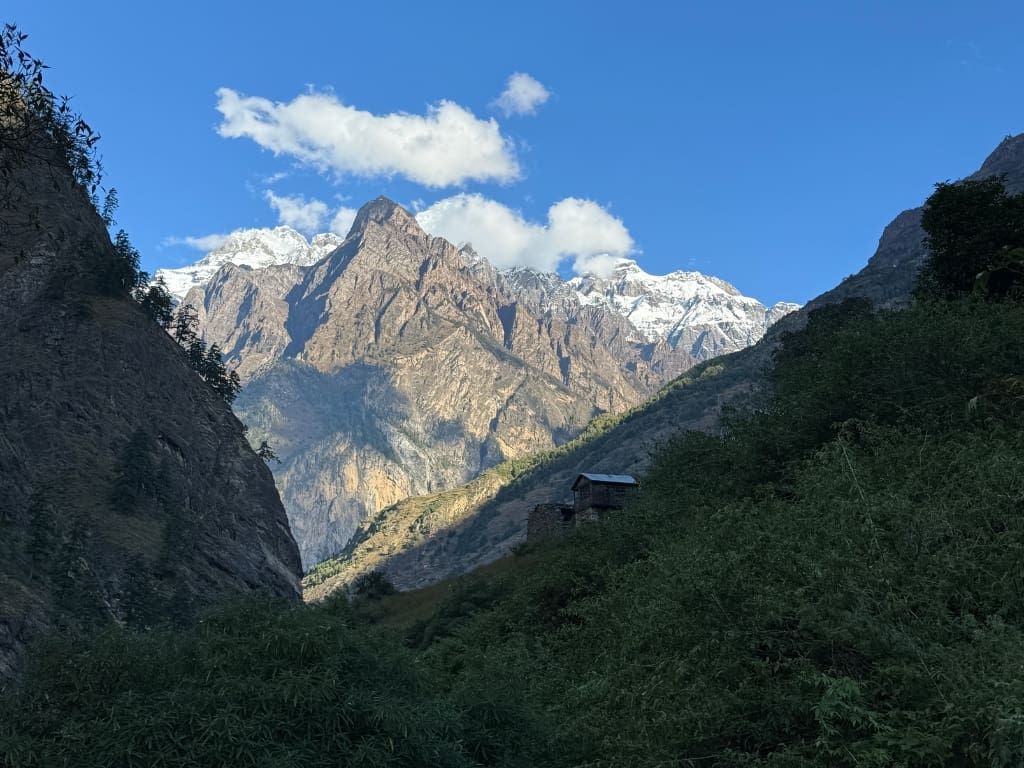
Day 4: Namrung → Shyala
- Distance: 12.9 km
- Time: ~5 h 45 min
- Elevation: ↑ ~1080 m / ↓ ~190 m
- Sleeping altitude: 3,500 m
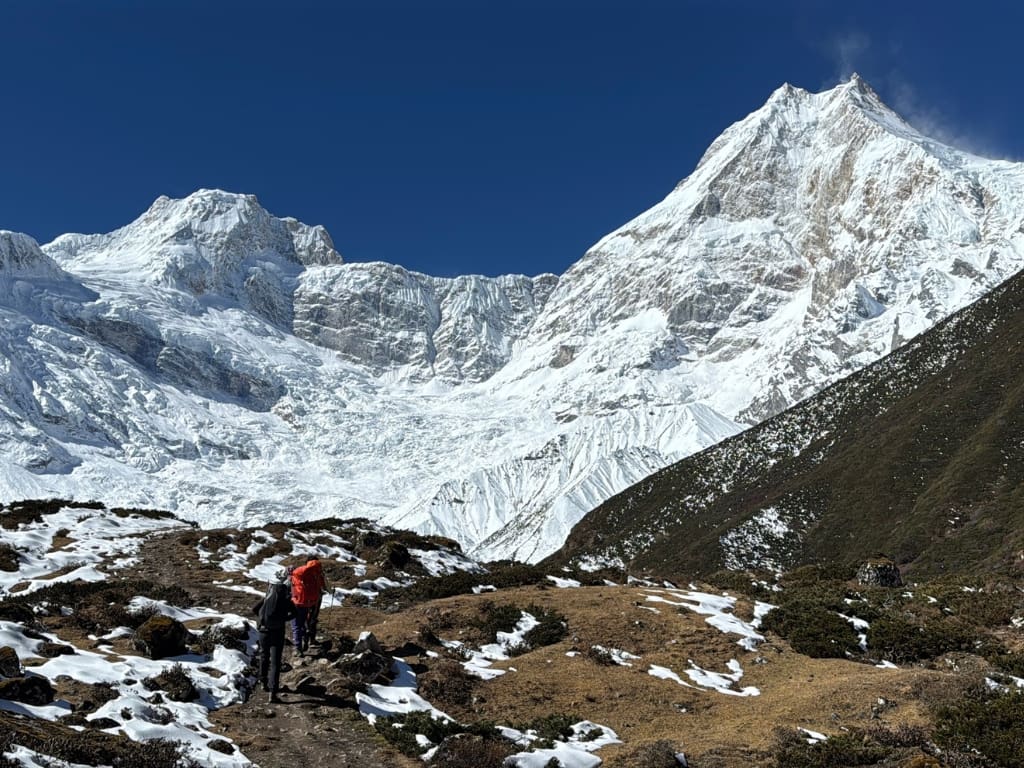
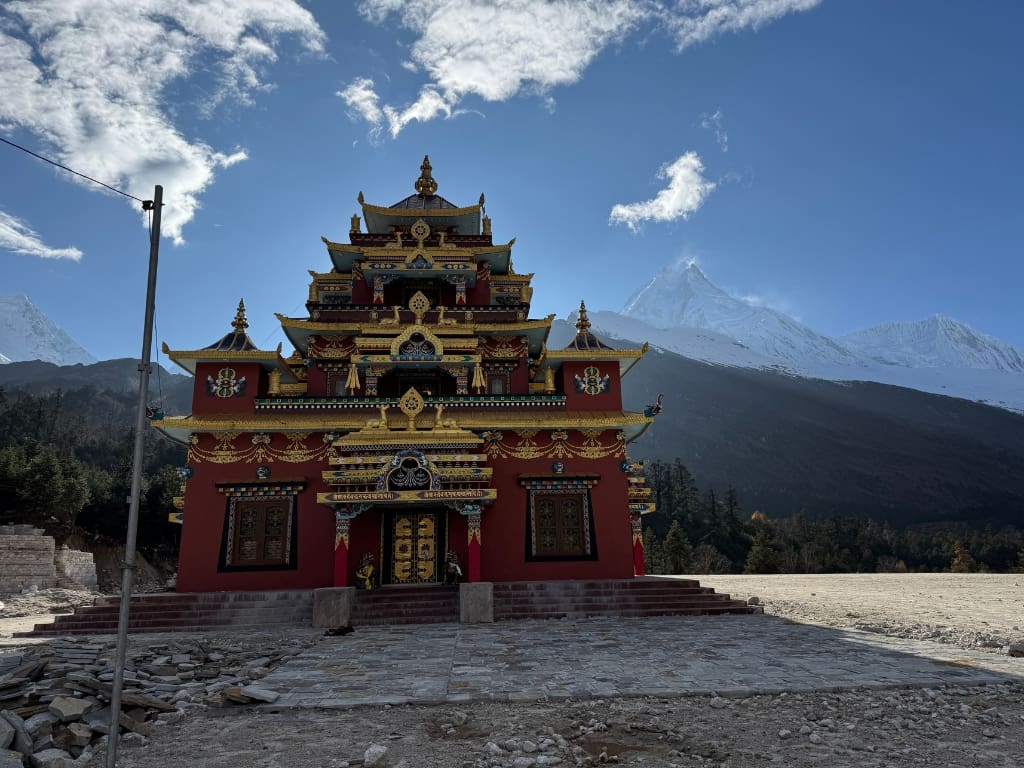
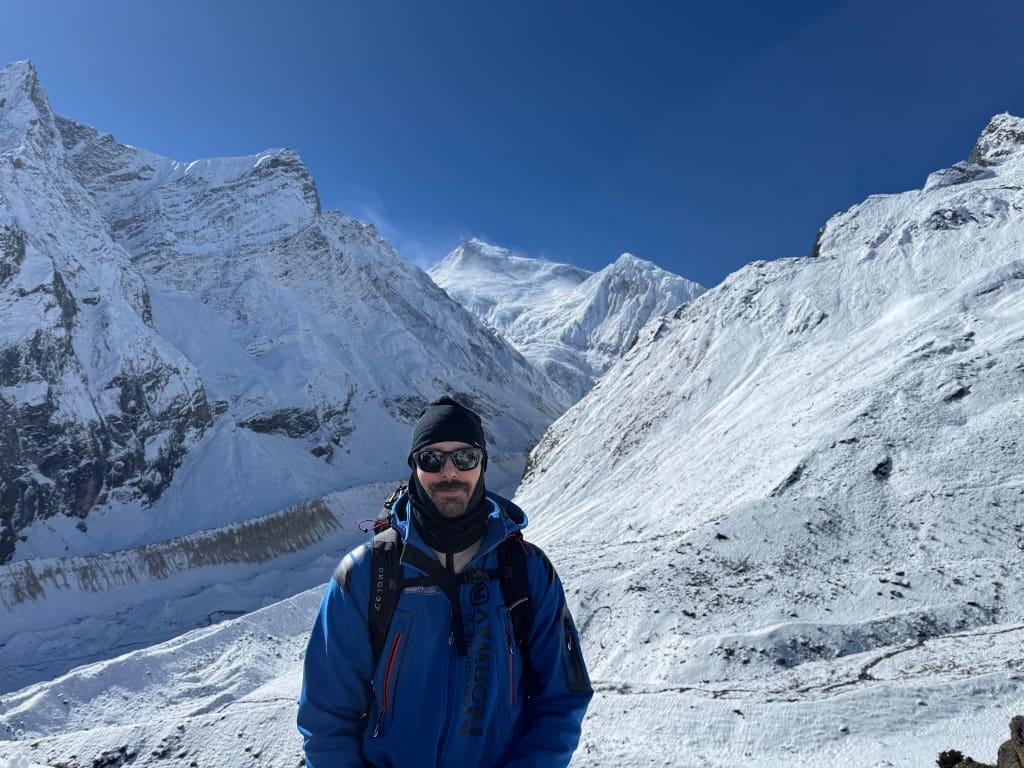
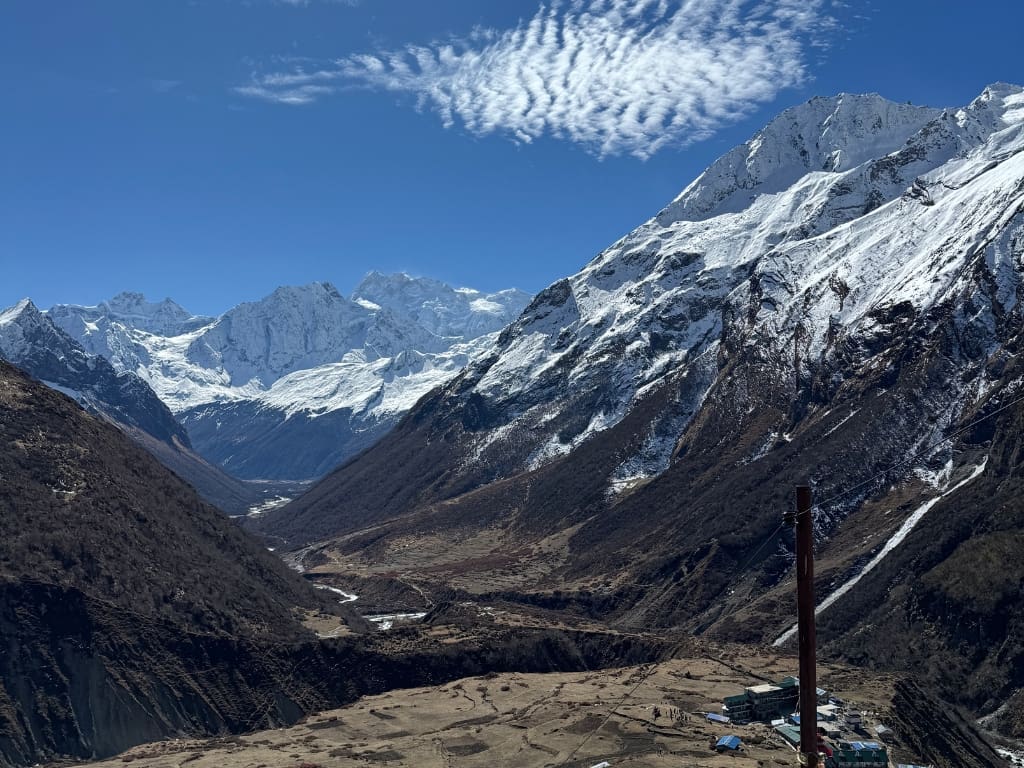
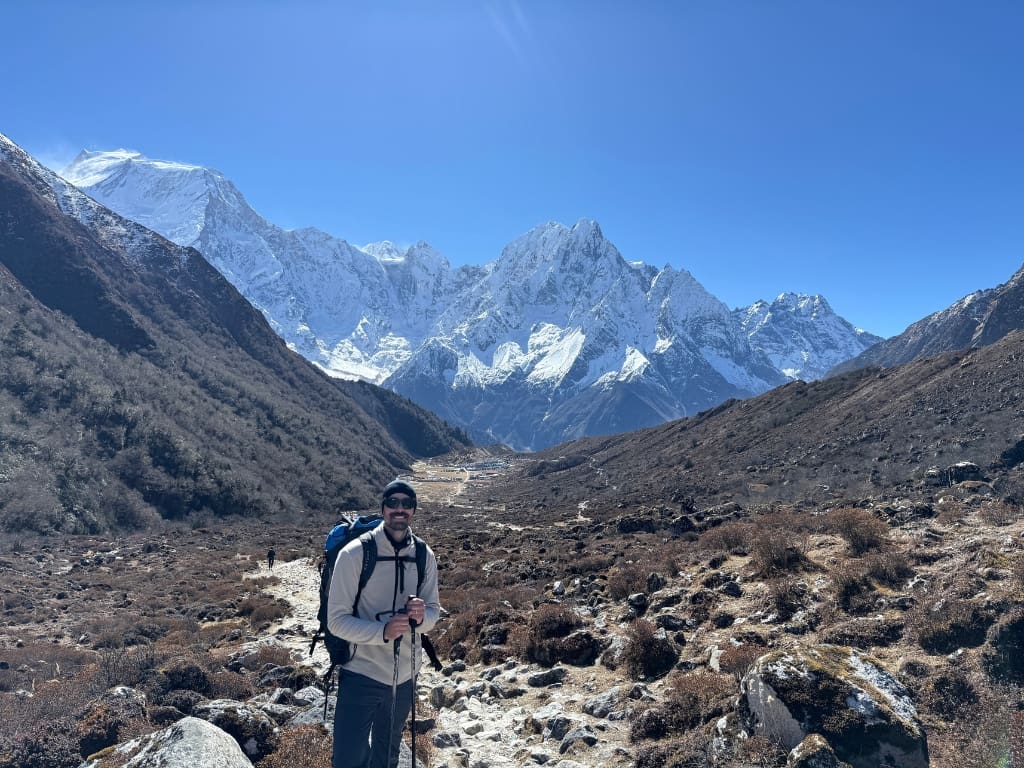
- Notes: Shorter day. Big mountain views, including Mt. Manaslu, start opening up. You start experiencing the Tibetan culture on every step (people, signs, statues, buildings).
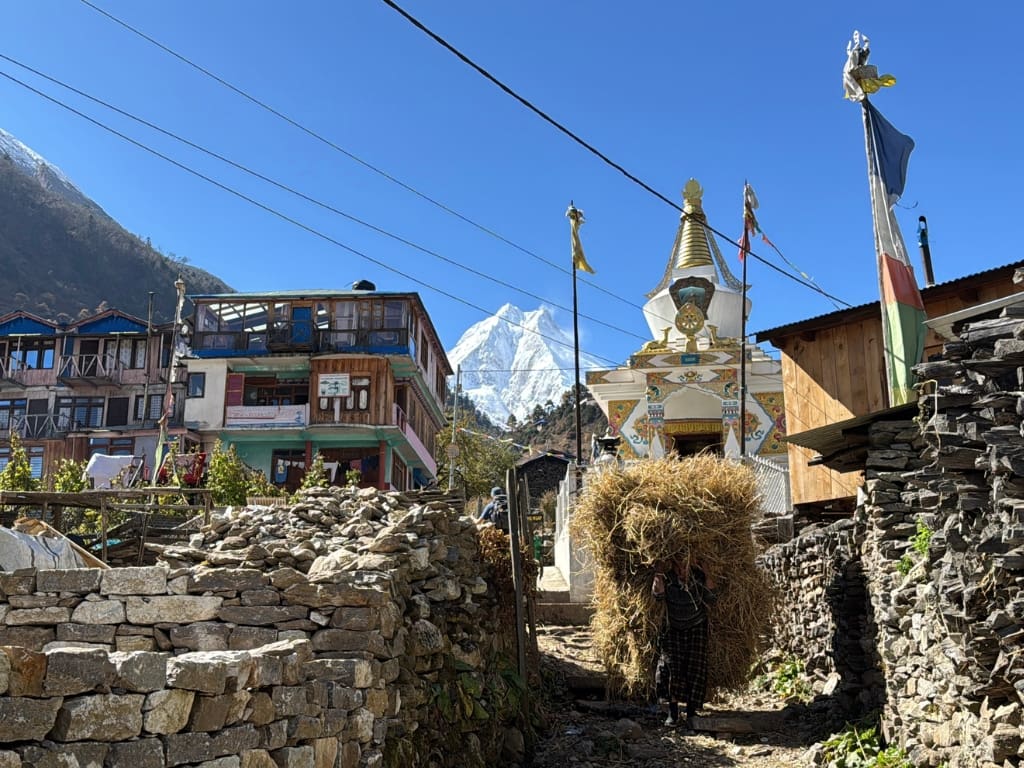
Day 5: Shyala → Samagaun (via Pung Gyen Gompa monastery acclimatization)
- Distance: 13 km
- Time: ~4 h 45 min
- Elevation: ↑ ~550 m / ↓ ~530 m
- Highest point of the day: 4,056 m
- Sleeping altitude: 3,510 m
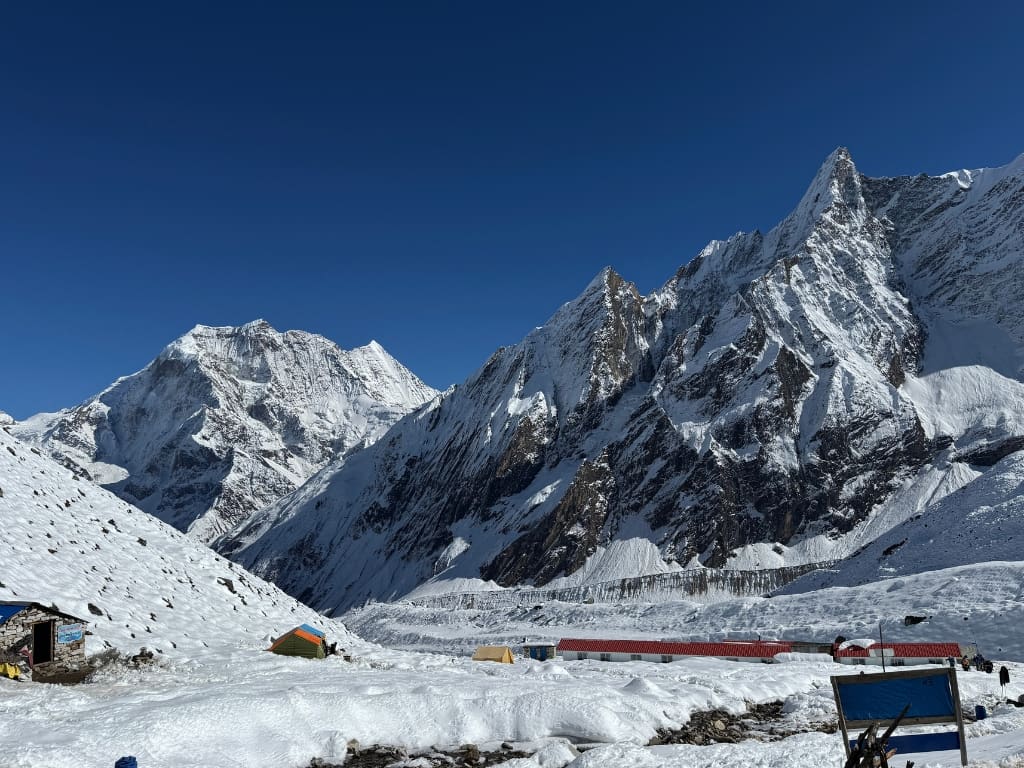
- Notes: Easy walking into a major acclimatization hub. Beautiful view of Manaslu covered in snow. For me, the highlight of the trek.
Day 6: Acclimatization Day: Samagaun to Manaslu Base Camp round-trip
- Distance: 14.5 km
- Time: ~7 h 45 min
- Elevation: ↑↓ ~1,320 m
- Highest point of the day: 4,831 m
- Sleeping altitude: 3,510 m
- Notes: Out-and-back hike. Optional but highly recommended for better acclimatization. Glacier and lake views, with a serious altitude feel. We haven’t gone all the way up because of the deep snow in the last 300 meters of elevation.
Day 7: Samagaun → Samdo
- Distance: 8.2 km
- Time: ~2 h 45 min
- Elevation: ↑ ~370 m / ↓ ~50 m
- Sleeping altitude: 3,880 m
- Notes: Very short hike to the last village. First night above 3,800 m. Very cold evening and night. Possible extra hike to the border with China, although this is quite a long walk.
Day 8: Samdo → Dharamsala (Larkya Phedi)
- Distance: 6.2 km
- Time: ~2 h 50 min
- Elevation: ↑ ~650 m / ↓ 60 m
- Sleeping altitude: 4,470 m
- Notes: Short hike to the camp area. Very basic rooms and just a simple toilet. Not much to do, just walk around and try not to freeze. First signs of headache and increased breathing frequency. Early night to get some sleep.
Day 9: Dharamsala → Bimthang (via Larkya La Pass)
- Distance: 15.5 km
- Time: ~6 h 15 min
- Elevation: ↑ ~670 m / ↓ ~1,440 m
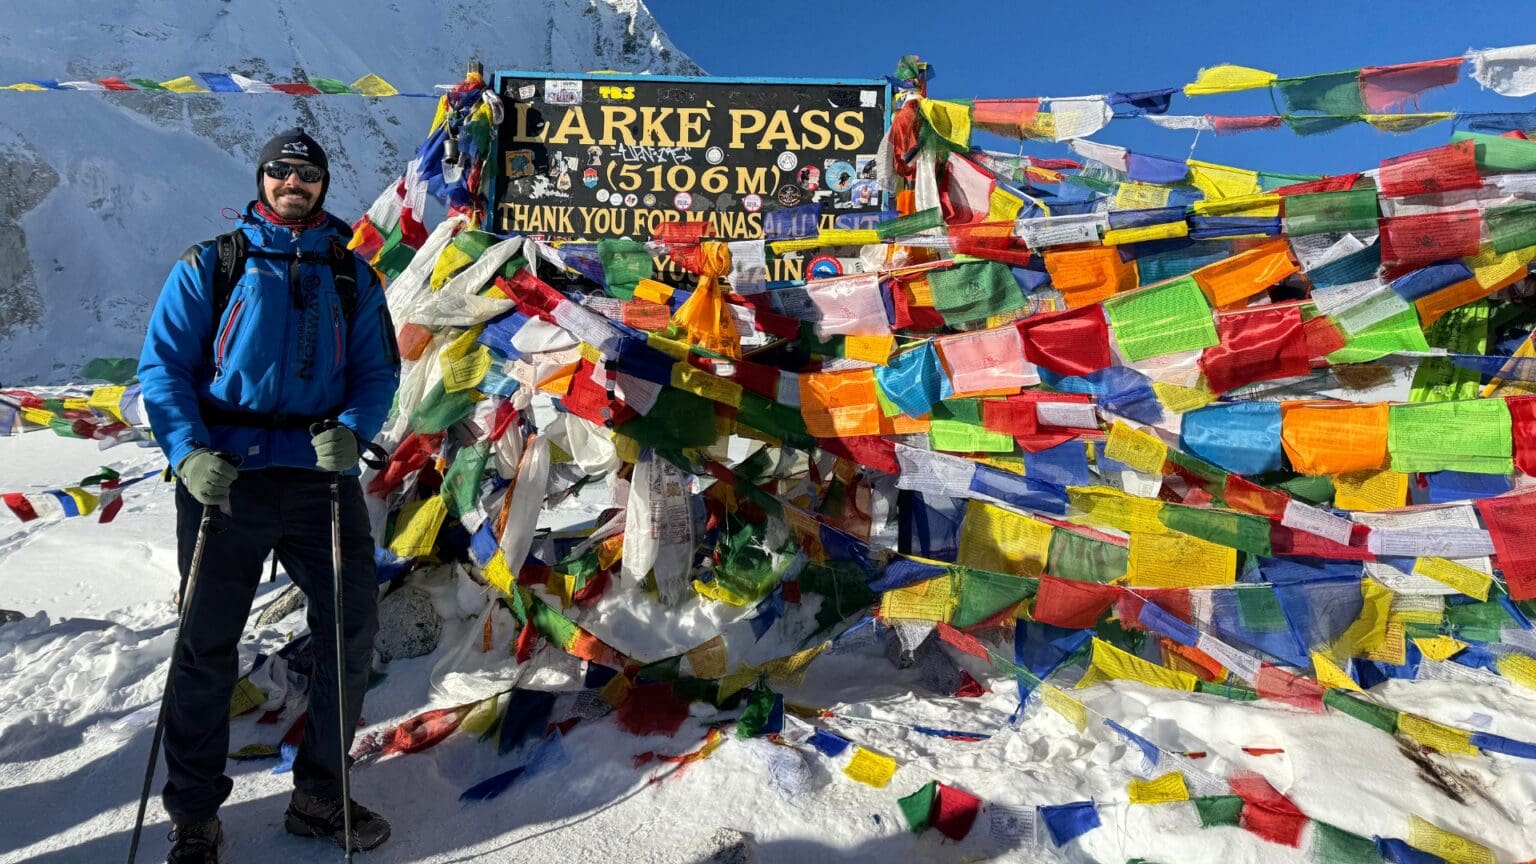
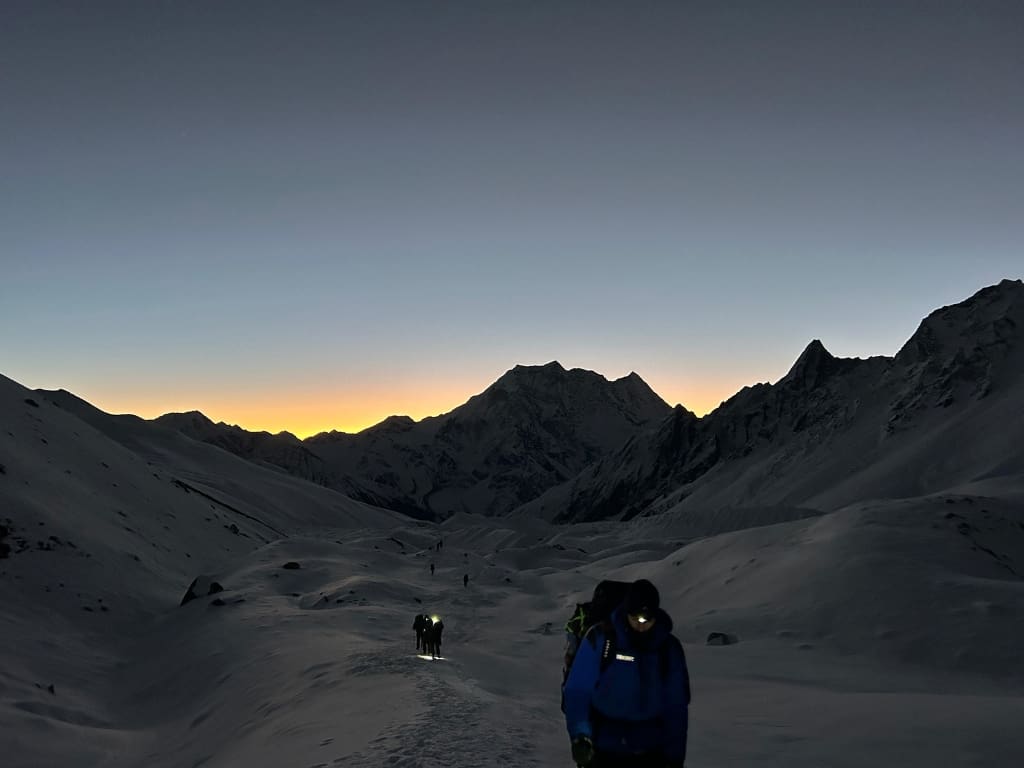
- Highest Point: Larkya La Pass ~5,106 m
- Sleeping altitude: 3,700 m
- Notes: Start before sunrise, at around 4 am. Crampons are necessary, and hiking poles help a lot. Cold, but luckily no wind. Mentally and physically demanding first two hours until sunrise. At the top, after 3.5 hours, we celebrated and took pictures. The long descent after the pass will test your knees and focus.
Day 10: Bimthang → Dharapani
- Distance: 24.9 km
- Time: ~8 h
- Elevation: ↑ ~320 m / ↓ ~2,140 m
- Notes: Long exit day. Returning through forests while it’s getting warm again. Last wave to Mt. Manaslu and well deserved hot shower in the afternoon. This day is usually split into two; however, it is perfectly manageable to do it in one.
Day 0 and Day 11: Ride from/ to Kathmandu
- Notes: 8 – 10 hours of bus or jeep ride, with a lunch stop.
Practical Tips & Mistakes to Avoid
- Pace: There’s no need to rush. Besides the first two days, the distances are quite short, so you have plenty of time to enjoy the views and go as slow or fast as you want.
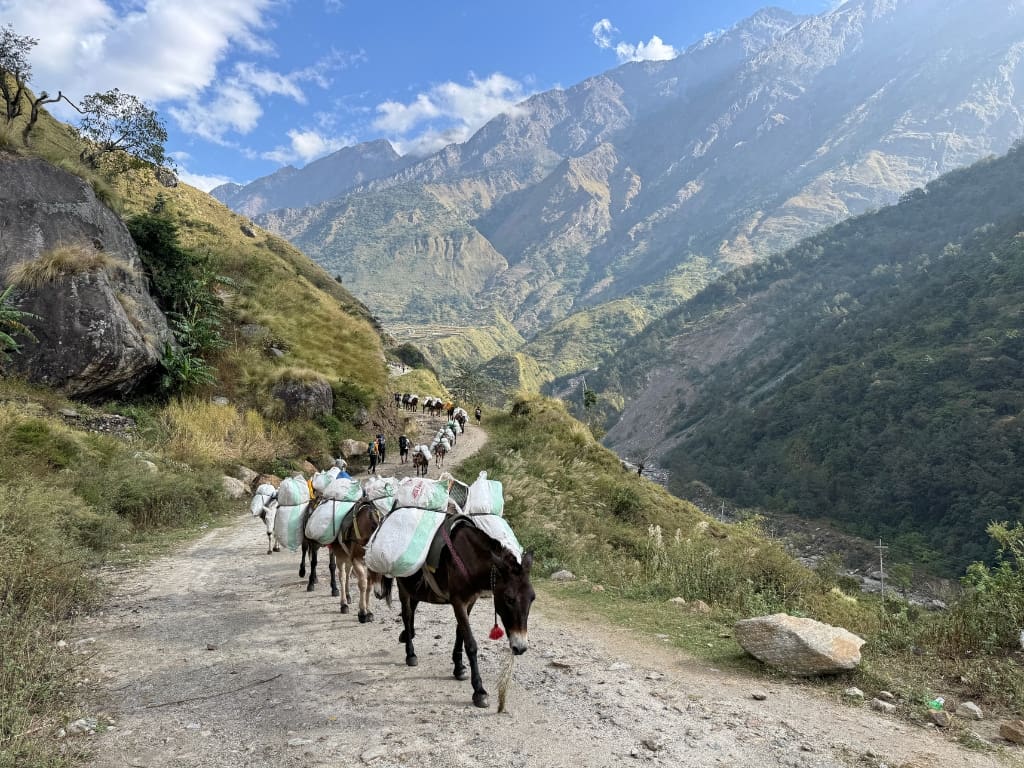
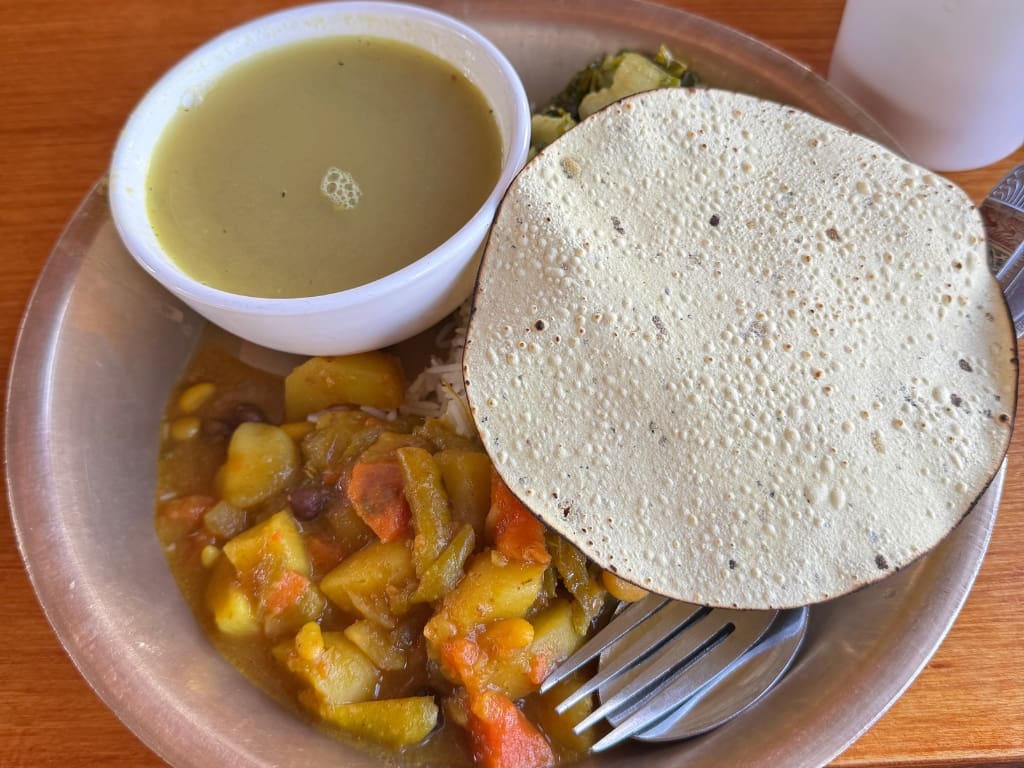
- Food: From day three onward, all supplies are carried by people or donkeys. The meat storage is questionable, so I recommend eating only vegetables and eggs on the trek. Dal baht was my personal favourite. Getting enough calories, mostly from carbs, is needed in a high-altitude environment.
- Snacks: Don’t bring much food. It takes weight, and you can buy many sweet or salty snacks in the villages or tea houses along the route. They get more expensive the higher you go, but still nothing crazy. Dry meat has the best protein-to-weight ratio, so maybe take that one.
- Charging: The sockets in many teahouses were not working properly, or they weren’t in the room at all. Bring a power bank for convenience.
- Wifi: Besides the camp at Dharamsala, there is paid wifi in every teahouse. It works well enough for sending messages and even video calls, but often not for streaming movies or YouTube.
- Afternoons: On most days, you arrive at the teahouse at around 3 pm. You can chill outside, but after sunset, it gets very cold, so you either stay in the heated dining room or in your sleeping bag. Make sure you bring books, playing cards, or download movies to pass the time.
- Buffer days: Plan at least 1 or two extra days after your trek. As I was saying, many people hiking a week before us had to wait for three days or return the same way because the Larkya Pass was closed.
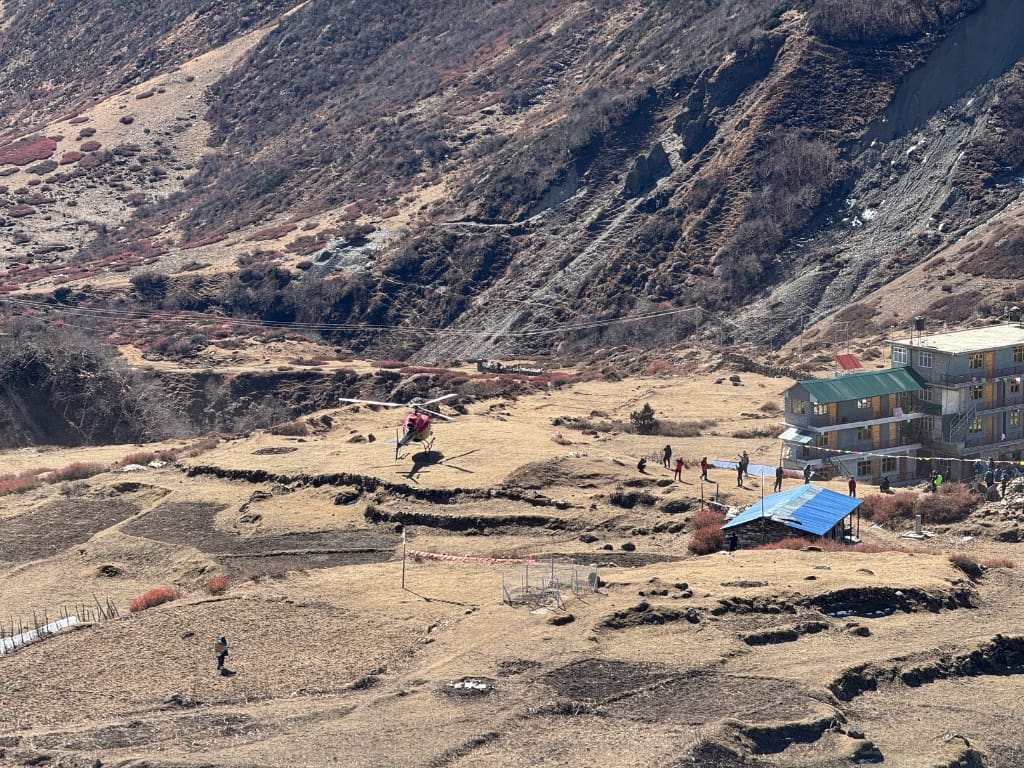
- Insurance: Make sure you have good health and travel insurance that includes helicopter rescue. We saw at least one helicopter flying over every day, and in this isolated region, medical emergencies can get serious. Specifically, check whether it covers hiking and up to what altitude. Basic insurance policies often cover only hiking under 3,500 m (11,500 feet).
Is Manaslu Worth It?
I really enjoyed the trek. It was challenging, but I still felt physically strong and well after finishing. It was diverse and culturally rich, with views simply unforgettable.
The only downside was the cold and very simple accommodation, with often only squatting shared toilets, no warm shower, etc. But overall, if I had to choose again, I would still pick this trek over the more famous ones.
If you want a trek that still feels like an adventure, not just a hiking holiday, Manaslu delivers. It’s more logistically annoying than Annapurna, less flashy than Everest, and in many ways better because of it.
Resources
All photos in this post were taken by me.
Disclaimer:
The information provided in this blog post is for general informational and educational purposes only and is not a substitute for professional medical advice. Always consult your physician or other qualified healthcare provider with any health problem. The use or reliance on any information provided in this blog post is solely at your own risk.